 This tutorial will walk you through the process of creating a restful web service using Eclipse, Jersey and CURL.
Before you start
this Java tutorial
To ensure you are able to follow this tutorial, the following prerequisites must be in place:
- A properly configured, working instance of the Eclipse IDE.
- A fully working install of Apache Tomcat web server to test your code.
- The Java Jersey libraries required for creating restful apps.
- The cURL libraries (if you are completing this tutorial on a Windows PC).
Creating the web service
To create a new web service:
- Open the Eclipse IDE and then select File -> New -> Dynamic Web Project (you may have to look under the Other section at the bottom) from the top menu.
- When the New Dynamic Web Project dialog opens, set the following values:
Project Name: FirstRestWebService
Target Runtime: Apache Tomcat 7.0
Dynamic web module version: 2.5
Configuration: <custom>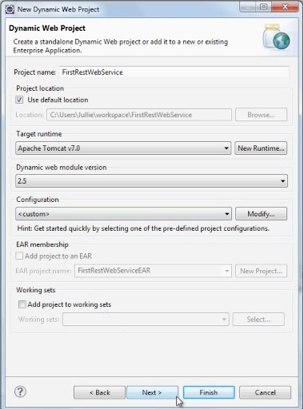 Click Next through the remaining screens. Click Finish to complete the wizard.
 - When the new project finishes loading, use the Project Explorer pane to open FirstRestWebService -> WebContent -> WEB-INF -> lib
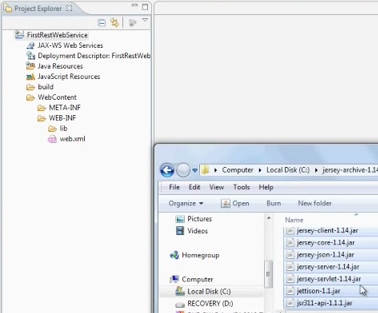
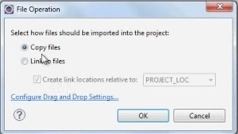
Drag and drop the previously downloaded Jersey .jar files into the lib directory as shown above. When prompted by the File Operation dialog, select Copy files then click OK.
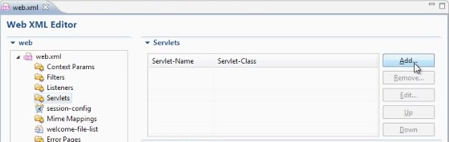
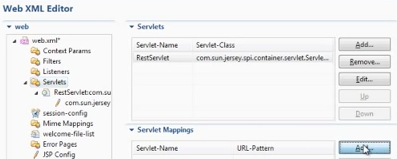
- Select web.xml from the Project Explorer tree view pane. When the main pane reloads, select Servlets from the web.xml tree, then click Add in the Servlets sub-pane:
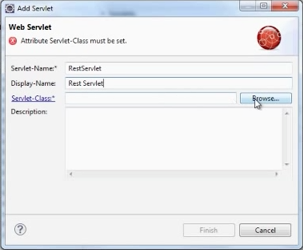
- In the Add Servlet dialog, set Servlet-Name to RestServlet and Display Name to Rest Servlet, then click Browse… next to the Servlet-Class field
Use the search text field to narrow the list of available choices by typing ServletContain, then select ServletContainer – com.sun.jersey.spi.container.servlet from the Matching items list.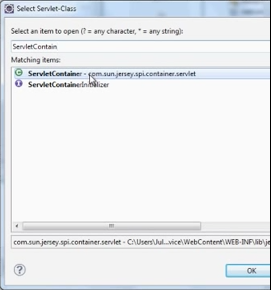
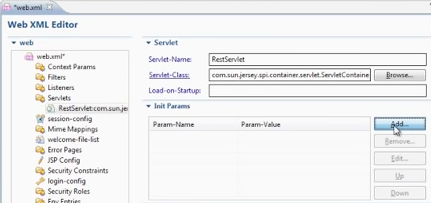
Click OK. Click Finish when you are returned to the Add Servlet dialog. - Next, click Add in the Init Params section of the Web XML Editor pane.
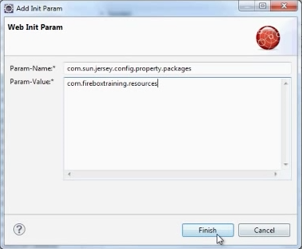
- The Init Params are used to predefine certain values for the service. Set Param-Name to com.sun.jersey.config.property.packages and Param-Value to com.fireboxtraining.resources (or similar for your own specific needs).
 Click Finish.
 - Back at the Web XML Editor, select Servlets from the navigation tree, then click Add… under the Servlet Mappings sub-pane.
- When the Add Servlet Mapping dialog loads, select RestServlet from the Servlet-Name drop-down. Define a URL-Pattern that suits your needs – we’ve chosen /rest/* – this means that in our example, the address used by our application will be http://localhost:8080/FirstRestWebService/rest/
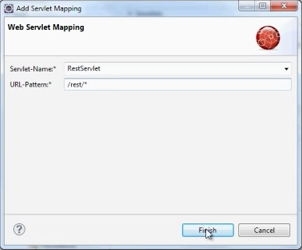
Click Finish to continue.
Building the underlying Java class
The next stage of the project is to build a Java class to interact with the servlet.
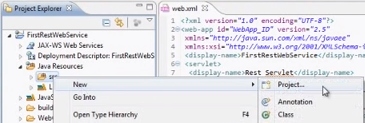
- In the Project Explorer pane, expand Java Resources and right-click on the src entry, selecting New -> Class
- In the New Java Class dialog box, set the Package value to com.fireboxtraining.resources and supply a suitable Name for the class – in our example we chose Hello. Also untick the Inherited abstract methods option.
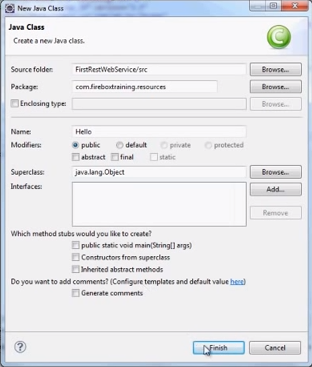 Click Finish to continue.
 - You will now be returned to the Hello.java code entry screen. Enter the code shown below:
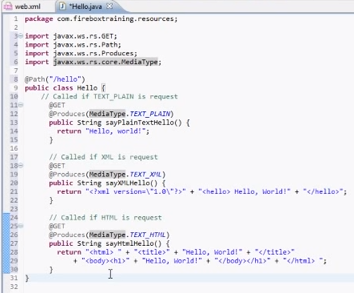
Basically this code allows your class to handle requests in plain text, XML and HTML formats. You can now save and execute the class.
Testing the servlet
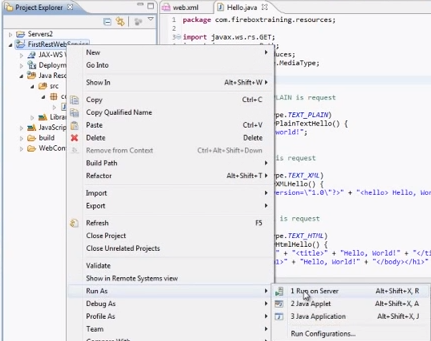
At this point you can now test the code by right-clicking on the servlet (FirstRestWebServlet) in the Project Explorer, then selecting Run As -> 1 Run on Server
Follow the instructions on the resulting dialog boxes to execute your code. Initially you will encounter a server error, but this is because the wrong URL is being used to access the page:
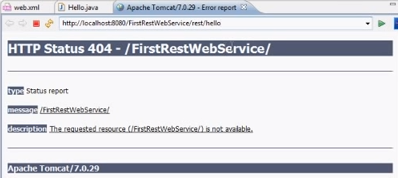
Change the website address to http://localhost:8080/FirstRestWebService/rest/hello and you should see the text “Hello, world!”:

Testing the servlet using cURL
To access the HTML and XML methods of the class, you need to use the cURL toolset.
- Open up the command line and enter the following command:
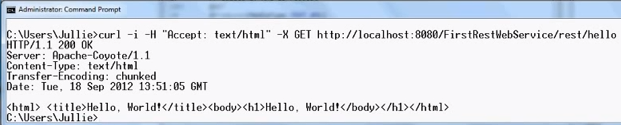
curl -i -H "Accept: text/html" -X GET http://localhost:8080/FirstRestWebService/rest/hello
This command generates a web request designed to elicit a response in text/html format as per the Java class created above. Press Enter to see the following output returned by your servlet:
- To get a response with XML content, modify the curl request thus:
curl -i -H "Accept: text/html" -X GET http://localhost:8080/FirstRestWebService/rest/hello
Which yields:

- To test the final output format, modify the command so:
curl -i -H "Accept: text/html" -X GET http://localhost:8080/FirstRestWebService/rest/hello
to return:

And there you have it, a basic restful Java servlet, built with Jersey and successfully tested using cURL.
Watch Our Video Creating A Restful Web Service (JAX-RS) Using Jersey, Eclipse and cURL
Subscribe to our Youtube channel to watch this video. Click here to review our Java training course options.
