Hard coding menu options may be perfectly fine for small applications that are unlikely to change over time, but in most environments you will want to reduce the manual labour required to extend and maintain the system. This tutorial shows you how to create multiple levels of navigation panes by setting up a menu model.
Before you start this Oracle ADF Tutorial
Before you can drag and drop data, you will need:
- An Oracle 11g database that is installed and running.
- Properly installed and configured JDeveloper tools instance.
- Credentials and permissions to launch the listener control and access the server on which your database is hosted.
- A new ADF application.
With these pre-requisites in place, you are ready to get started.
The basics of creating a navigation pane
At this point you can begin building your first navigation pane.
- Expand your project in the Navigator pane and locate the Page Flows entry. Right-click it and select New
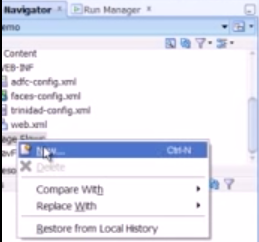
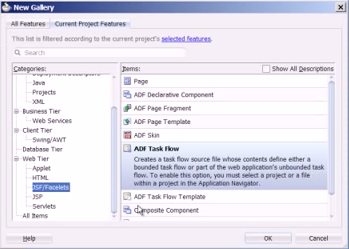
- From the New Gallery dialog box, select ADF Task Flow and click OK.
- Fill in the relevant fields on the Create Task Flow dialog box.
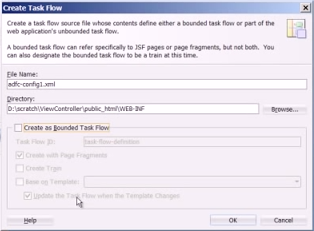
Make sure that you de-select the Create as Bounded Task Flow option. Click OK. - When the dialog box disappears, drag the Wildcard Control Flow Rule option from the Component Palette and drop it onto the central pane. It should now look like this:
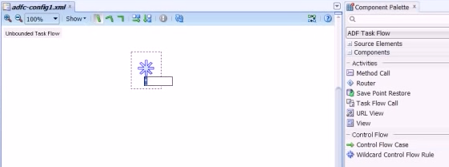
- Drag and drop the View component in the same way. You will need to add one View for each page you want to display in your hierarchy. We’ve added two:
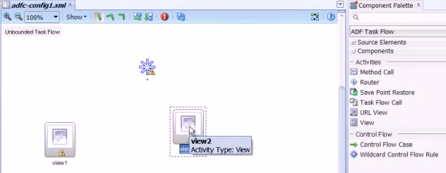
You can rename each view by clicking on its name. Our example uses ‘Page 1’ and ‘Page 2’ for simplicity. You also need to add a view for any subpages you want to branch off Page 1 and Page 2. - To create the relevant link between the flow rule and the page, click Control Flow Case in the Component Palette and draw a line from your rule (the icon that looks like an asterisk) to Page 1.

Change the name of the rule to match the page name. Repeat for each page, bearing in mind that subpages need to be linked back to the rule, not the parent page.
And with that, you have created your very first, very basic navigation pane.
Adjusting navigation pane hierarchy
With your navigation pane initial set up complete, you can begin the process of ordering the structure. For this example we are using unbounded task flow created previously using the HR test data.
- Select the relevant task flow from the left-hand Navigator pane.
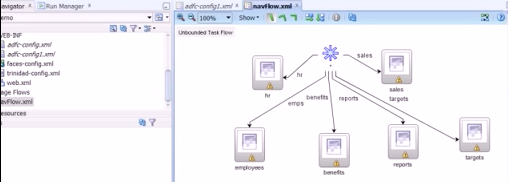
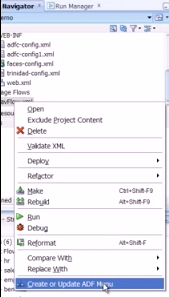
- Right click on the task flow item (in this instance called NavFlow.xml) and select Create or Update ADF Menu
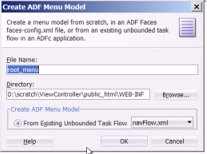
- When prompted, supply a suitable File Name and click OK
- The main pane will now refresh, displaying an XML listing of the menu structure. You will also see each of the elements listed in the bottom-left pane of the window.
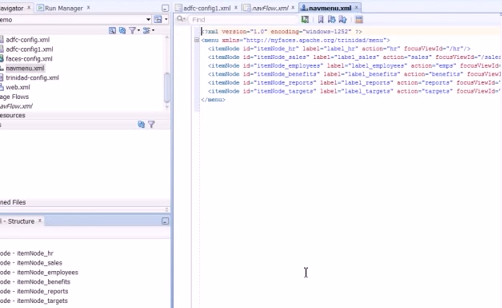
At the moment, all of the menu items exist on the same level – there is no hierarchy as default. - In the Structure pane, select the entry which you want to be a sub-menu item and drop it on the “parent” node. This then creates the necessary nesting automatically.
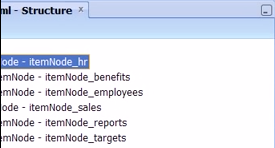
In our example, benefits and employees are sub-nodes of hr, and reports and targets are sub-nodes of sales. - If required, you can also change the display name of the menu item – by default they are labelled by the node name. Simply select the item to be relabelled and change the Label property in the right-hand Property pane.
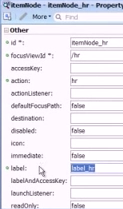
The menu item is now complete and ready to be used.
Preparing the menu model for display
The final stage of your project is to actually put the menu to work.
- Right-click on the relevant project in the Navigator pane and select New. Select ADF Page Template from the New Gallery and click OK
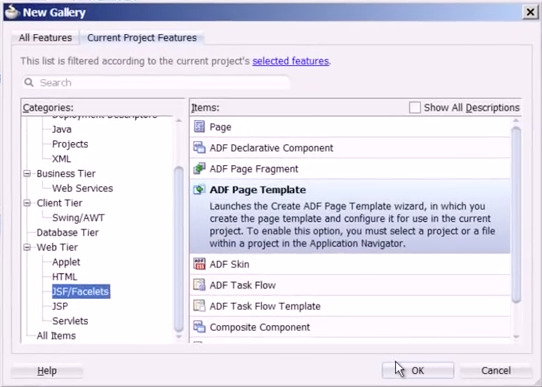
- Give the page a meaningful File Name on the Create ADF Page Template dialog and adjust other settings as desired.
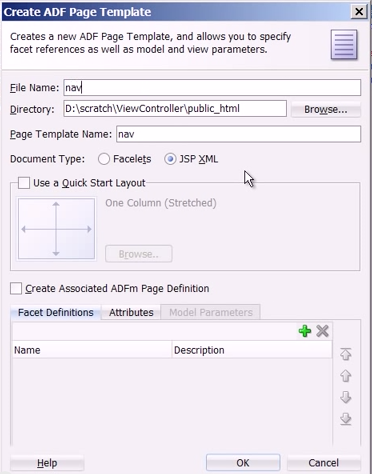
Under Attributes, click the green cross icon to add new attributes – for our example we have created a simple placeholder called My Panel
Click OK to save your changes. - You are now presented with a blank navigation page ready for customization. Select Navigation Pane from the Component Palette and drag it across to your menubar item in the Structure pane
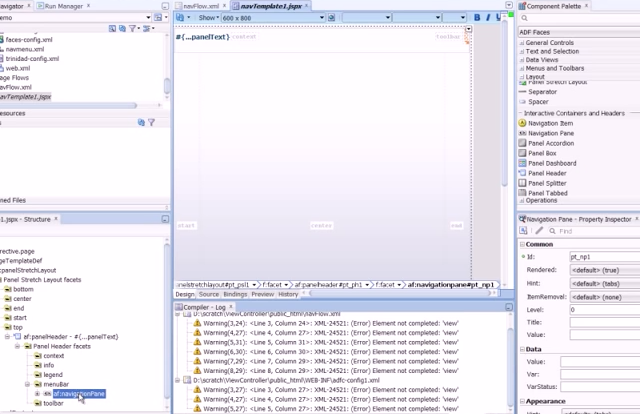
- With the new navigation pane highlighted in the Structure Pane, click in the Value field of the Property Inspector. In the pop-up Expression Builder dialog select your navmenu option and click OK
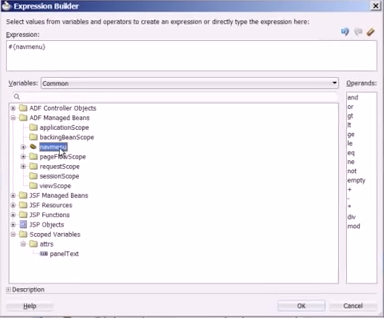
- You can now adjust the various setting for the navmenu object. Level, as the name implies specifies the level at which the item is displayed. You will also need to ensure that the navmenu has a Var value set – for our test we are using n – which will then be used to reference the item elsewhere.
- Switch back to the Structure pane and expand the tree below menuBar until you can see nodeStamp

- Right-click nodeStamp and select Insert Inside nodeStamp -> ADF Faces…

- From the Insert ADF Faces dialog box select Navigation Item and click OK
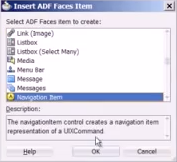
- Use the Property Inspector to change the Text of the new navigation item to the new navigation item by typing #{n.label}
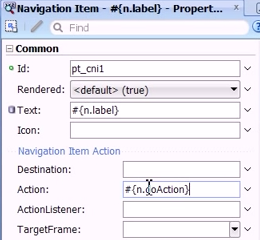
You also need to change the Action value to enable referencing, using #{n.doAction} - To ensure the menu bar displays correctly, change the Hint property of the af::navigationPane object, selecting Bar from the dropdown
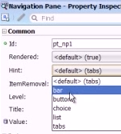
The menu bar is now configured read for use on a page.
Displaying the menu model on a page
Finally it comes time to test the menu bar on a page to ensure all of the options and submenus display correctly.
- Using the Component Palette, drag a Decorative Box onto the center panel of your page layout.
- Drag a Navigation Pane object into the Top section of the page layout.
- Right click inside the Top section and repeat the steps above for Insert ADF Faces, although this time with the following settings: Value: #{navmenu}
Level: 1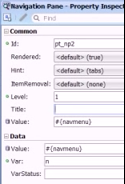
- Repeat step 3, this time for the nodeStamp object, changing the properties thus:
Text: #{n.label}
Action: #{n.doAction}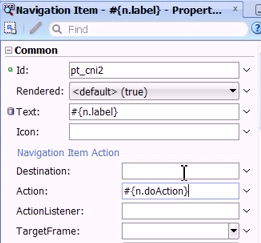
You should now see that the menu is rendering as tabs in the central pane too. - Now we need to add a space to hold dynamic content. Right-click in the center panel of the page layout and select Insert Inside Facet center -> ADF Faces…
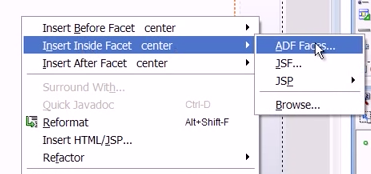
- Select Facet from the Insert ADF Faces Item dialog
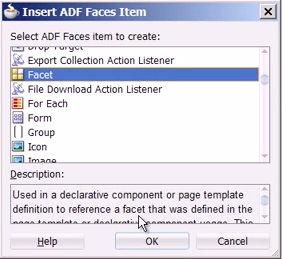
Click OK and then supply a descriptive Facet Name when prompted.
The dynamic placeholder page is now ready.
Creating pages for dynamic menu options
The final stage of the process is to create a JSP page for each of the menu options created way back at the start of the tutorial.
- Locate your navTemplate1.jspx file in the Navigator pane and then click on the navflow.xml pane in the center of the screen. You should be able to see details of the unbounded task flow created at the start of the tutorial:
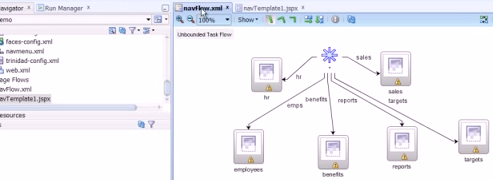
- Double click any of the pages marked with an exclamation mark – we’re using hr – to open the Create JSF Page dialog. Make the following settings:
Document Type: JSP XML
Page Template: navTemplate1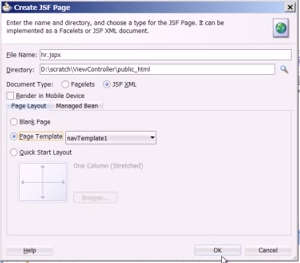 Click OK to apply the changes.
 - Repeat step 2 for all the other pages marked by an exclamation mark.
The page is now ready for testing. Fire it up in your browser and you should see the menu options you have been working hard to create:

Clicking on any of the menus in the top right corner will change the submenu options shown in the bottom left automatically. Congratulations – you’ve just made your first dynamic menu!
Watch our ADF tutorial video on creating navigation panes
I hope you find this ADF training tutorial useful – Take a look at our Intro and advanced ADF courses online here to become a master! You can view all of our training tutorial videos on our Youtube channel here.
Please Share This Knowledge With Others!