Moving data between tables in your Oracle database can be time-consuming and labour intensive. This tutorial shows you how to configure your ADF environment to allow for drag-and-drop movement of data between tables, speeding the whole process up in future.
In our example we will be using the HR schema.
Before you start this Oracle ADF Tutorial
Before you can drag and drop data, you will need:
- An Oracle 11g database that is installed and running with the HR schema data.
- The relevant permissions to access, query and update the Oracle database.
- An additional column on the employees table called EMPTYPE with a type of CHAR(1).
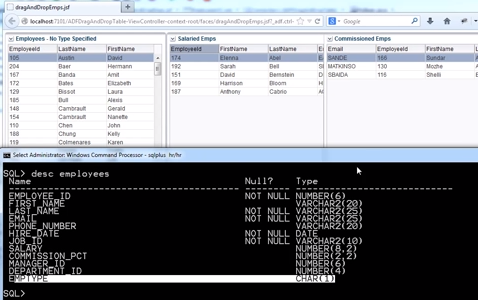
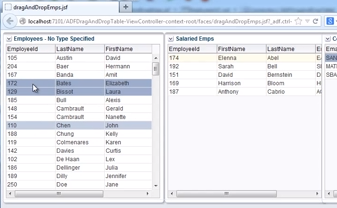
In our example, some of the employee records have been assigned an EMPTYPE of S for ‘salaried’, others have C for ‘commissioned’ whilst the rest have been left blank. The idea being that as we drag and drop table rows, the EMPTYPE for the selected records will be updated automatically.
Employees with no type specified are converted to ‘salaried’ employees simply by dragging and dropping the relevant table rows.
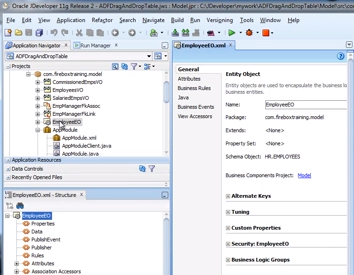
The example also relies on having created several associated entity objects:
EmployeeEO corresponds to the EMPTYPE column.
EmployeesVO queries all employees without an EMPTYPE value and is built on the EmployeeEO entity:
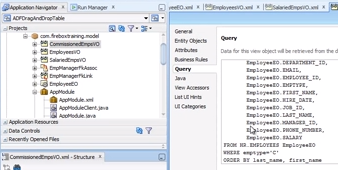
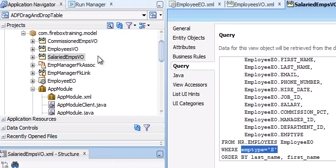
SalariedEmpsVO queries all employees with an EMPTYPE of S and again, is built on the EmployeeEO entity:
CommissionedEmpsVO queries all employees with an EMPTYPE of C and is also built on the EmployeeEO entity:
Although there are a lot of pre-requisites in setting up drag and drop functionality, the future time savings will more than compensate.
Creating a JSF page
To provide the necessary drag and drop interface, you must first create a JSF page:
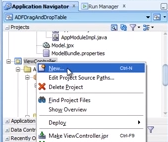
- Open the JDeveloper environment and locate the ViewController node in the Application Navigator pane. Right click and select New…
- From the New Gallery select Web Tier -> JSF followed by Page from the main pane:
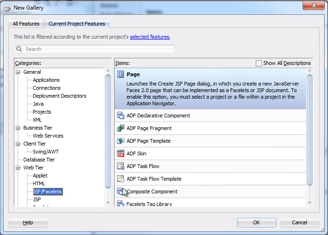 Click OK.
 - In the Create JSF Page dialog, supply a useful File Name (“adfdraganddroptest.jsf”) and select the Blank Page radio button:
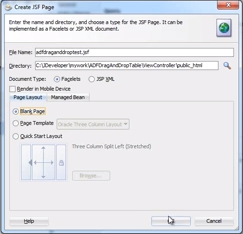
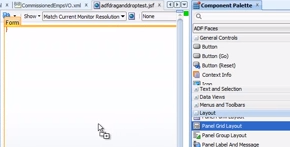
Click OK. - The new blank page will now open in the center of the JDeveloper screen. Expand the Layout pane on the right-hand side of the screen, then drag the Panel Grid Layout control onto the page.
- In the Create Panel Grid Layout dialog, set Columns to 3 and Rows to 1.
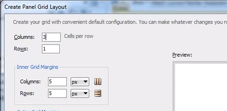
Click Next then Finish. - In the left-hand pane of the JDeveloper screen, expand the page structure to reveal the three newly created cells:
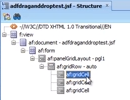
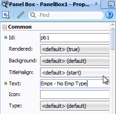
Right-click the first grid cell and select Insert Inside of afgridCell -> Panel Box layout: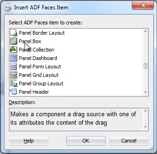 Click OK to add the panel box. Now using the Panel Box properties pane, change the default assigned Title to ‘Emps – No Emp Type’.Repeat this process for the two remaining cells, changing the titles to ‘Salaried Emps’ and ‘Commissioned Emps’ respectively.
- Select the ‘Emps – No Emp Type’ panel box and then locate AppModuleDataControl -> EmployeesVO 1 control in the Data Controls pane. Drag the control onto the relevant panel box in the pane below.

From the Create context menu, select ADF Read Only Table.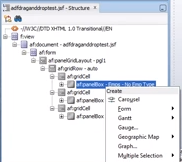
Use the Edit Table Columns dialog box that pops up to remove any columns you don’t want displayed. For our example we have chosen to display EmployeeId, FirstName and LastName – you can use the red cross button to remove unwanted columns: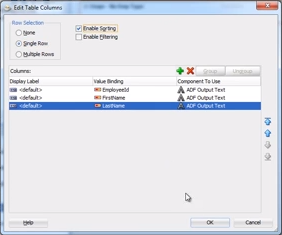
Use the supplied options to enable Single Row row selection and Enable Sorting. Click OK to complete the editing process.Repeat the process for the SalariedEmpsVO and CommissionEmpsVO data controls.
- Click Save to save your amended page.
Defining a Drag source and a Drop target
Dragging and dropping data always needs a source and a target. Here’s how to do that:
- Expand the form structure using the left-hand pane to locate the entry afitable – t1 under the Emps – No Emp Type entry.
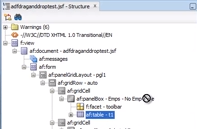
- Switch to the Component Palette on the right-hand side of the screen and locate the Drag Source component. Drag it across to the afitable – t1 entry and drop it.

- Change the Drag Source properties using the Property Inspector at the bottom-right of the JDeveloper window using the following settings:
Action = MOVE
DefaultAction = MOVE
Discrimininant = <leave default> (‘rowmove’)
- Return to the Component Palette and locate the Drop Target component. As before, drag and drop it onto the afitable – t1 form element.

- You will now be prompted to supply an Insert Drop Target.

Click the small arrow next to the text input field to access the Property Menu, then select Edit… to attach the correct managed bean method. - The Edit Property DropListener* dialog will now appear. Click New… to begin the process of creating a managed bean.
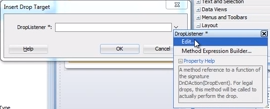
- Apply the following settings to the new managed bean:
Bean Name = DropBean
Class Name = DropBean
Also ensure that the Generate Class If It Does Not Exist checkbox is select.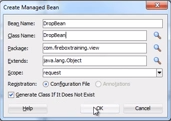
Click OK. - You will now return to the Edit Property DropListener* dialog box. Click the New… button alongside the Method dropdown:

- Set the new Method Name to HandleDragDrop and click OK

- Click OK on each of the dialog boxes to apply the changes. When the Insert Flavor prompt appears. Click the supplied down arrow and select Edit… for the FlavorClass
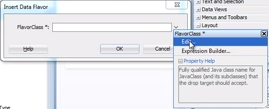
- In the Edit Property: FlavorClass* window, select the Hierarchy tab, then expand the available options to access org -> apache -> myfaces -> trinidad -> model -> rowKeySet:
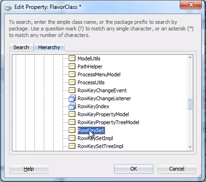
Click OK and OK again to return to the JDeveloper designer pane. - Select the afiDropTarget tag in the bottom-left Structure pane.
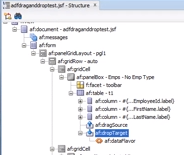
Change the Drop Target properties in the Property Inspector pane thus:
Actions = MOVE
The other properties can be left as default.
- Locate the afidataFlavor item in the Structure pane (located directly under afiDropTarget):
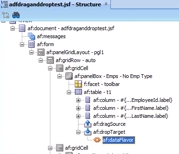
Set the Discriminant value to ‘rowmove’ – the same as the default value which was sent when we created the DragSource control.
- In the form structure pane, locate and select the dragTarget and dropSource elements under afitable – t1. Right-click and select Copy.
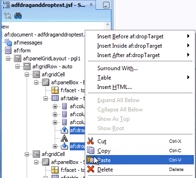
- Now locate afitable – t2, right-click and select Paste. Repeat again for afitable – t3.
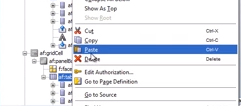
- Click Save!
Programming the drop bean
With the jsf page configured, you can now move on to programming the drop bean.
- Click the afitable – t1 table nestled under Emps – No Emp Type in the Structure pane. Type binding into the Property Inspector search bar, and then use Edit to change the value.

- In the Edit Property Binding dialog, select DropBean from the Managed Bean drop down.

- Click the New… button next to Property. Set the Property Name to empTable on the Create Property dialog.Click OK twice to return to the page designer.

- Repeat steps 1 to 3 for both afitable – t2 (Salaried Emps) and afitable – t3 (Commissioned Emps). At step 3, when you are creating the new property, set the names as:
‘salariedTable’ for afitable – t2
‘commissionedTable’ for afitable – t3 - Now the bindings are complete, the code associated with the DropBean code will have been updated:
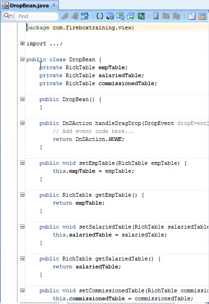
Programmatic access is now available for each of the rich tables on the jsf page for instance. But at present, the bindings only provide view access to the data controls: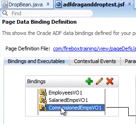
The page still needs bindings to facilitate the commit and re-execute operations. - Click the green + icon to add a new binding, then select action from the Insert Item dialog.
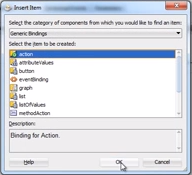
Click OK.
- The Create Action Binding dialog box opens. Select the ApplicationModuleDataControl entry in the Data Collection pane, set the Operation dropdown to Commit and click OK.
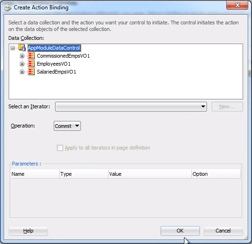
- Repeat steps 6 and 7 for the EmployeesVO1 data collection setting the Operation dropdown to Execute.
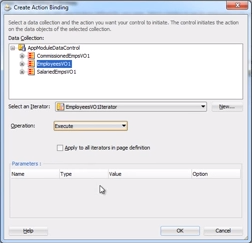
Once back in the Bindings and Executables pane, select the new Execute binding and using the Property Inspector, set the id to ‘executeEmployees’. This will then be the ID we use to reference the biding from code.
- Repeat steps 6 to 8 for the SalariedEmpsVO1 data collection, again ensuring the Operation is set to Execute.
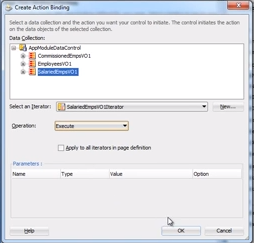
This time you should set the id property to ‘executeSalaried’. - Repeat steps 6 to 8 for the CommissionedEmpsVO1 data collection, setting the Operation to Execute.
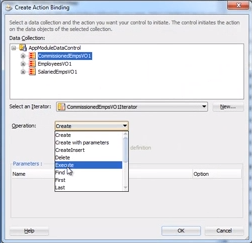
This time, set the id property to ‘executeCommissioned’. - Click Save. All of the new bindings are now available programmatically to the managed bean.
- Switch into the DropBean.java code window and locate the public DniAction section:
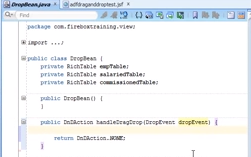
- Add the code shown in the image below:
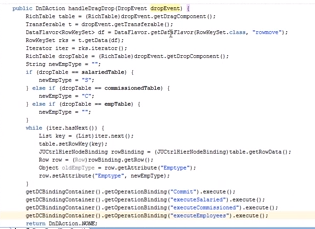
Amend the final line of code, so it now reads:
return DnIAction.MOVE;This code will then perform the necessary data actions based on your drag and drop operations (a full walkthrough of the code is available in this Firebox tutorial video).
- Add the following private helper method to access the dcBinding:

- Click Save
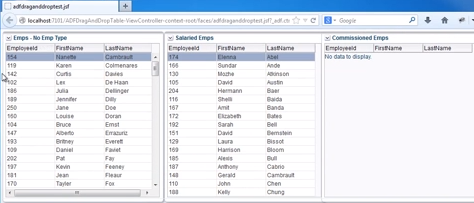
Everything should now be in place. Your new page will show three tables – Emps – No Emp Type, Salaried Emps and Commissioned Emps (note that the Commissioned Emps table is currently empty):
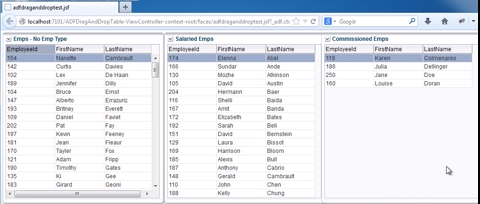
Try selecting some of the rows and dragging them onto the Commission Emps table:
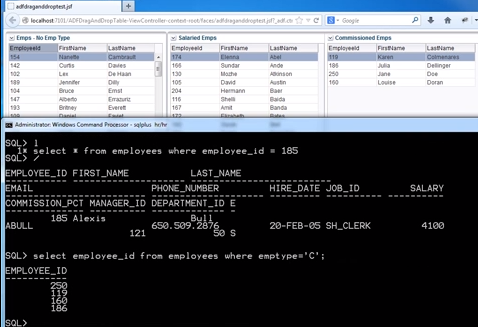
Verify the data has been updated in the database by dropping into your SQL query commend line and running the following query:
Select employee_id from employees where emptype=’C’;
You will now see a list of employee numbers that tallies perfectly with the table on your page:
And there you have it – drag and drop data updates from your pages. Obviously this is a very simple examples that show how to use the drag and drop technique, but you now know the basic of how to display and update data from your Oracle database in this way.
You can click here to look at our Oracle ADF Online Training schedule.
For a video version of this tutorial, visit the Firebox Training YouTube channel.
Please Share This Knowledge With Others!