 This OBIEE 11g training tutorial shows you how to build a basic OBIEE repository before making it live for use by other developers. You will build it offline and then make it active at the end.
Before you start this OBIEE Tutorial
Before you can drag and drop data, you will need:
- An Oracle 11g database that is installed and running with the bisample dataset.
- Credentials and permissions to access the bisample database.
- Access to the Oracle BI Administration tool.
- Access to an OBIEE instance, along with admin level credentials.
- Access to the Enterprise Manager Fusion Middleware Control instance, along with admin level credentials.
With these pre-requisites in place, you are ready to get started.
Creating a new, offline repository
Initially you should always create new repositories offline until you are sure they are ready to go live.
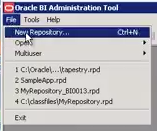
- Open the BI Administration tool and select File -> New Repository from the main menu.
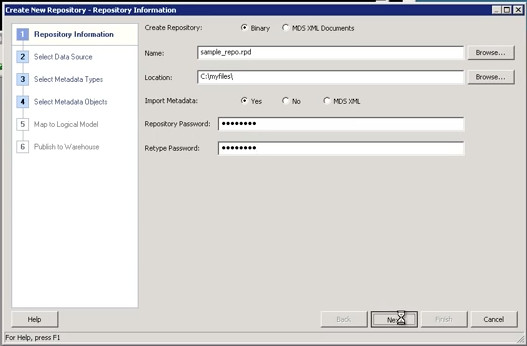
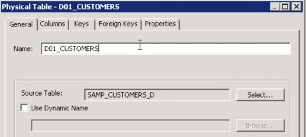
- When the Create New Repository dialog opens, click the Browse button next to the Name field. Identify a suitable location for the new repository and click Open
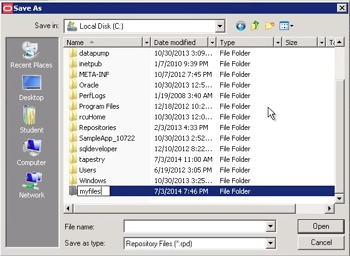
For this example we have created a new folder called myflies which is stored in the root of C:. Then supply a suitable filename and click Save. - Ensure the Import metadata radio button is selected, then type the new password for your new repository twice as prompted in the appropriate fields. Click Next.
- When the Select Data Source dialog opens, make the following settings:
Connection Type: OCI 10g/11g
Data Source Name: <<Your connection string>>
User name: <<A user ID with a suitable level of permissions>>
Password: <<The password for the chosen user ID>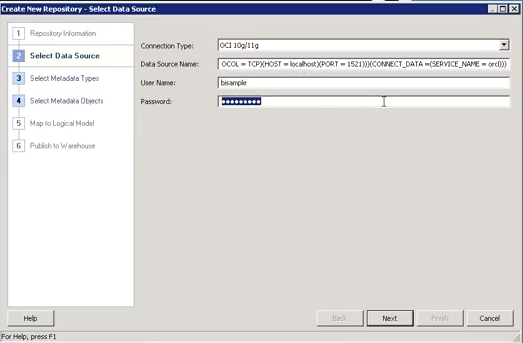
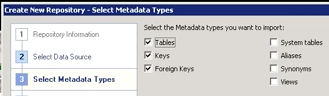
Click Next. - On the Select Metadata Types dialog, ensure that Tables, Keys and Foreign keys are all selected. Click Next.
- When the Select Metadata dialog opens, locate the bisample database and then select the following tables from the Data source view pane:
SAMP_CUSTOMERS_D
SAMP_EMPL_D_VH
SAMP_OFFICES_D
SAMP_PRODUCTS_D
SAMP_REVENUE_F
Click the small > button to add the selected columns to the Repository View pane. You will now be prompted to modify the Connections Pool. Supply a suitable name (BISAMPconn for instance) and click OK.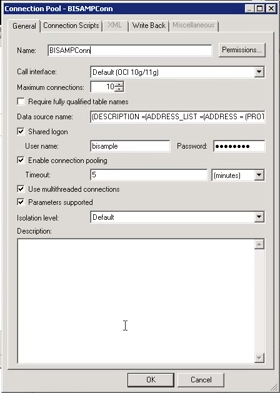
Click OK – the repository will then import the selected information into the Repository View pane.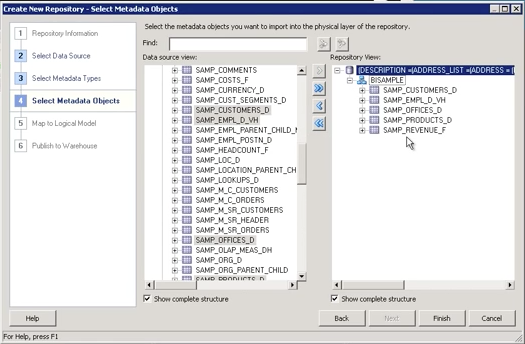 Click Finish
The initial repository set-up is now complete.
Working with the new repository
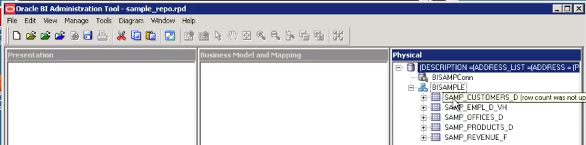
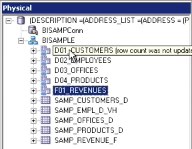
The basic configuration of the new repository is now complete – you can see the Physical layer in the BI Administration tool:
To make the data easier to reference in code, we have created an alias for each table. This step is entirely optional:
Our completed alias creation process now leaves the Physical pane looking like this:
Creating relationships
The next step is to create relationships between these tables.
- Select all of the aliases, right-click and choose Physical Diagram -> Selected Object(s) Only to open the Physical Diagram window.
- Drag each of the table objects to place F01_REVENUE in the center of the screen
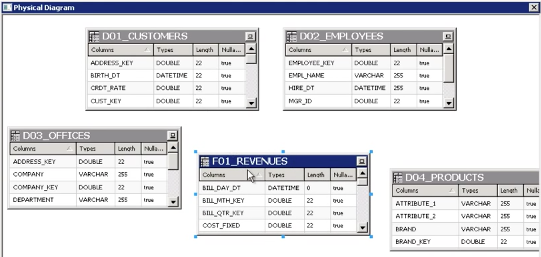
- Click the New Join button and draw a line from F01_REVENUES to D03_OFFICES. In the Physical Foreign Key dialog box, locate and select OFFICE_KEY in both of the Column panes.
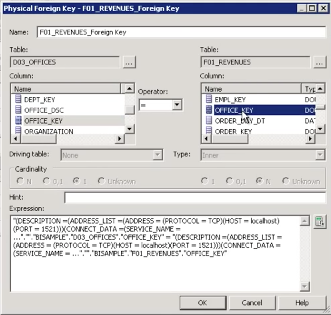 Click OK to continue.
 - Repeat step 3 for the other three remaining tables – D01_CUSTOMERS (join on the CUST_KEY), D02_EMPLOYEES (join on the EMPLOYEE_KEY) and D04_PRODUCTS (join on the PROD_KEY). You should now see arrow pointing from F01_REVENUES to each of the other tables.
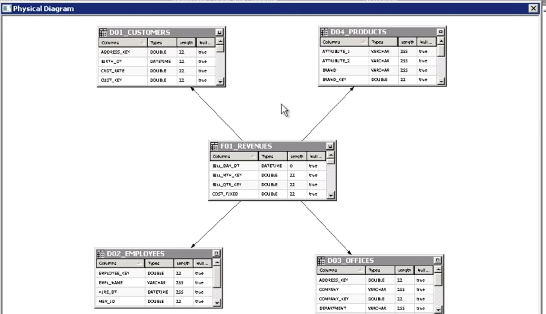
And just like that, the necessary relationships have been created.
Creating a business model
Next you want to create an object in the business model layer.
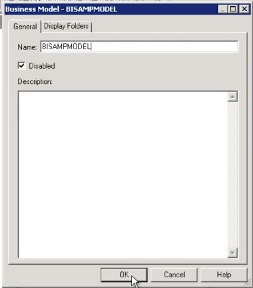
- Right-click in the Business Model and Mapping column of the BI Administration interface. Select New Business Model from the context menu.
- Supply a suitable Name for the new business model, ours is called BISAMPMODEL, and click OK
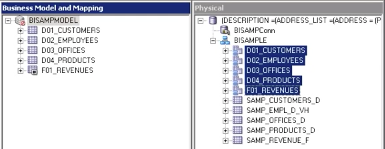
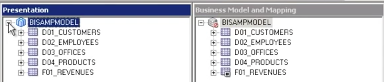
- Select the aliased tables from the Physical pane and drop them on top of your new BISAMPMODEL object in the central column
- To ensure that the data returned by the repository is genuinely useful, some further configuration is required. Expand the F01_REVENUES option and double-click the REVENUE table to open the Check Out Objects dialog:
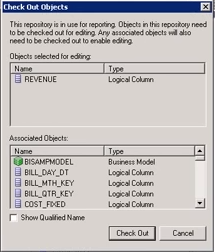 Click the Check Out button.
 - In the Logical Column – REVENUE dialog, select the Aggregation tab.
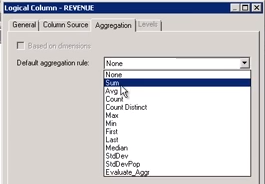
Select Sum from the Default aggregation rule: dropdown. Click OK to apply the changes. - Repeat steps 4 and 5 for the Units table.
Creating a presentation layer object
Finally, we want to create an object in the presentation layer for our repository.
- Select BISAMPMODEL in the Business Model and Mapping pane and drag-amd-drop it into the Presentation layer pane.
For our example we are going to stick with the default presentation object, so no further configuration is required.
Making the repository available
At this point your basic repository is complete. The next step is to make it available for queries.
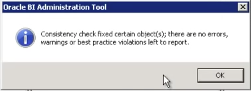
- First, click File -> Save to launch the Check global consistency prompt:
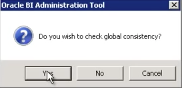
Click Yes. - When the consistency check completes, you will be prompted to make the business model ready for queries – click Yes
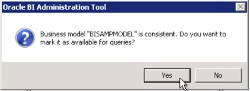
- You may receive a further dialog warning about some consistency fixes having been applied – click OK
Everything is now ready for testing. Close the BI Administration app and move onto the Enterprise Fusion Manager console.
Making your repository active
Before you can use the repository to create a new analysis, you need to make it active. For this you need to log into the Enterprise Fusion Manager console.
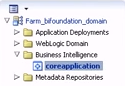
- Once you are logged in, select Business Intelligence -> core application from the left-hand nav menu
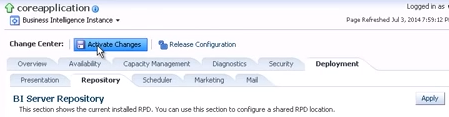
- Click the Deployment tab, followed by the Repository tab in the main pane.
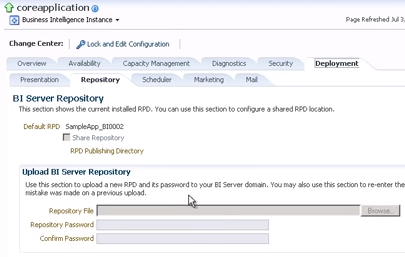
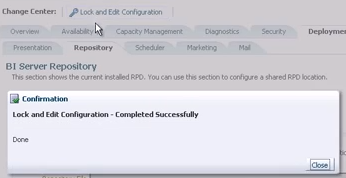
- To enable the settings, click the Lock and Edit Configuration button, followed by Close on the pop-up dialog
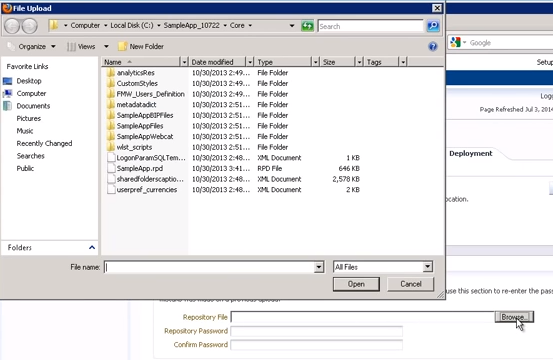
- Click the Browse button and locate the repository created above. When you find it, click OK.
- Enter the repository password as prompted, and change the Catalog Location as required. Finally click Apply, followed by Activate Changes
- You now need to restart the OBI processes to complete the change as shown below.

- Drop into the command line and issue the following instruction to stop all relevant OBI processes
opmnctl stopall
Once the command completes, you can restart the processes by entering the following command:
opmnctl startall
This may take up to a minute – this command will help you verify everything is running properly.
opmnctl status
Your pre-config is now complete – time to build an analysis that uses the new repository.
Working with your repository
Now it is time to try out the new repository – log into the OBIEE console to get started.
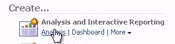
- When the console opens, select Analysis from the Create subsection of the left-hand pane
- You will now see that your repository is available for use
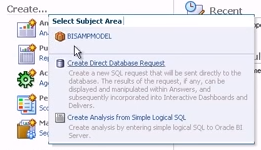
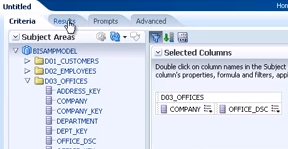
Click on the BISAMPMODEL subject. - When the model loads, you can see the available aliases in the Subject Areas pane. You can now drag and drop tables into your analysis in the Selected Columns pane.
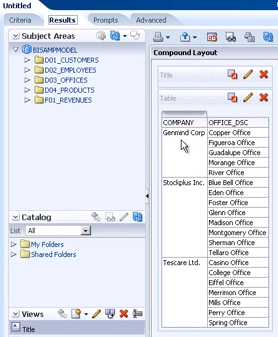
- Click on the Results tab to see how the repository is pulling data through
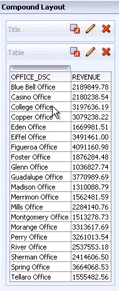
- You can also pull through additional data – drag and drop REVENUE from the F01_REVENUE subject area onto the Compound Layout tab
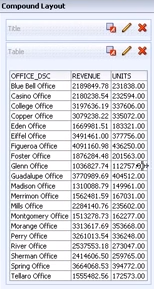
- Repeat step 5, for UNITS to demonstrate some additional aggregation at work.
Watch Our OBIEE 11g Repositories Training Video
And there you have it. We have a specific OBIEE course dedicated to 11g repositories, click here for more information. Take a look at all three of our OBIEE 11g training courses by clicking here.
Subscribe to our Youtube channel to watch this video.
